Upload Your Photos
There are 4 ways to add your photos to a gallery.
1) Batch Upload
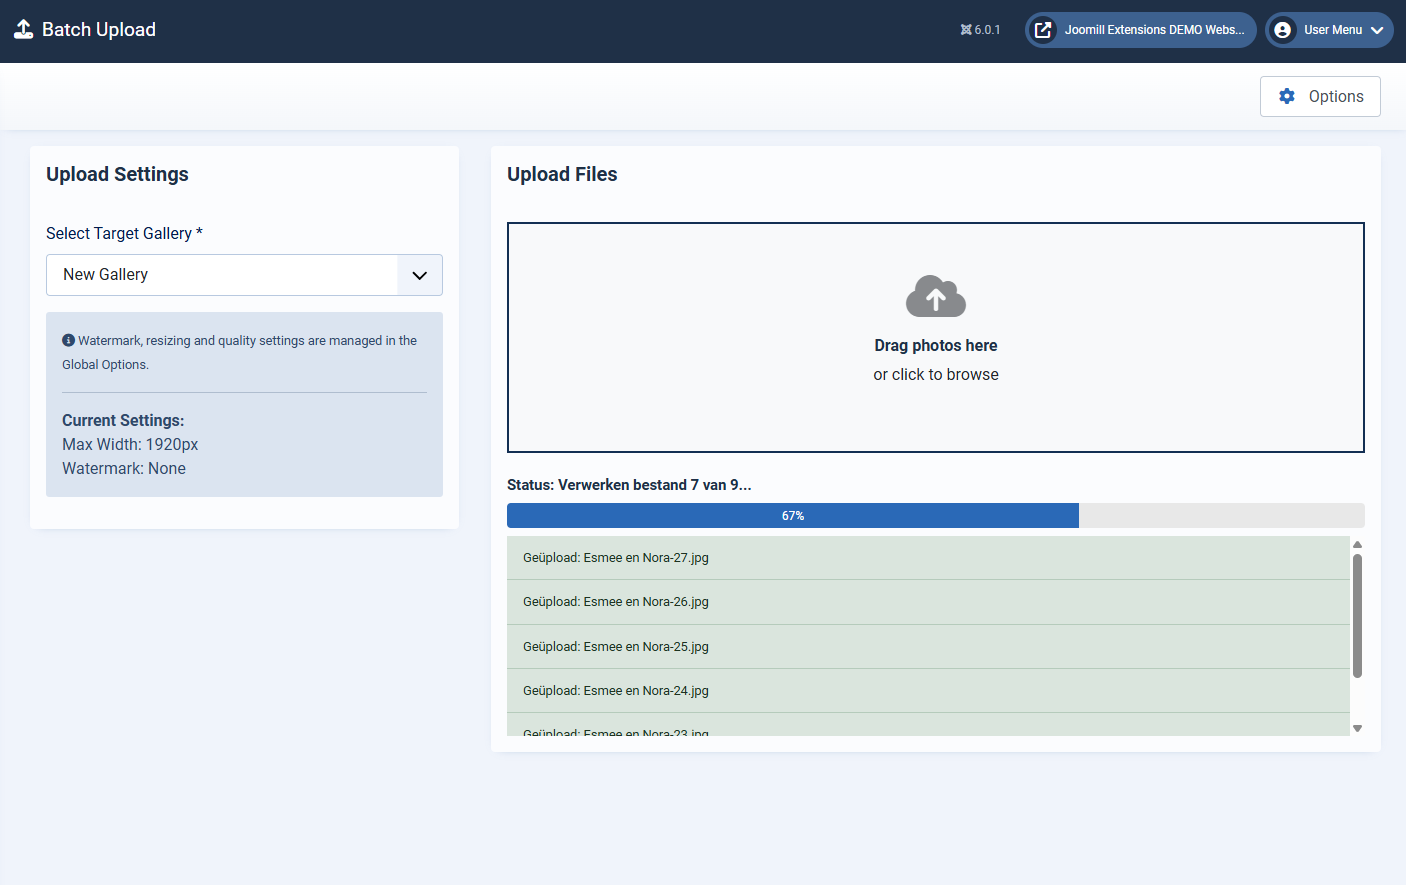
Go to Components » Client Response Gallery » Photos and click the button BATCH UPLOAD on top of this page.
Select the Target Gallery. The images will be uploaded to the gallery's own folder under /images/clientresponsegallery/, see Where the photos are stored below.
Watermark, resizing and quality will be applied and settings are managed in the Global component Options.
Drag and drop or browse to select your photos. Wait until the status shows finished.
Only JPG, PNG and WebP files are accepted. Other file types are rejected automatically.
2) Upload manually
You can upload your photos through FTP or the Joomla media manager.
Add them to a subfolder of /images/clientresponsegallery/ and select this folder when creating a new gallery in the Import from Folder option.
Note: Resize, Quality and Watermark options will not be applied
Note: photos imported this way keep the folder you created yourself. For a gallery with a password, choose a folder name that cannot be guessed from the gallery title.
3) Upload 1 by 1
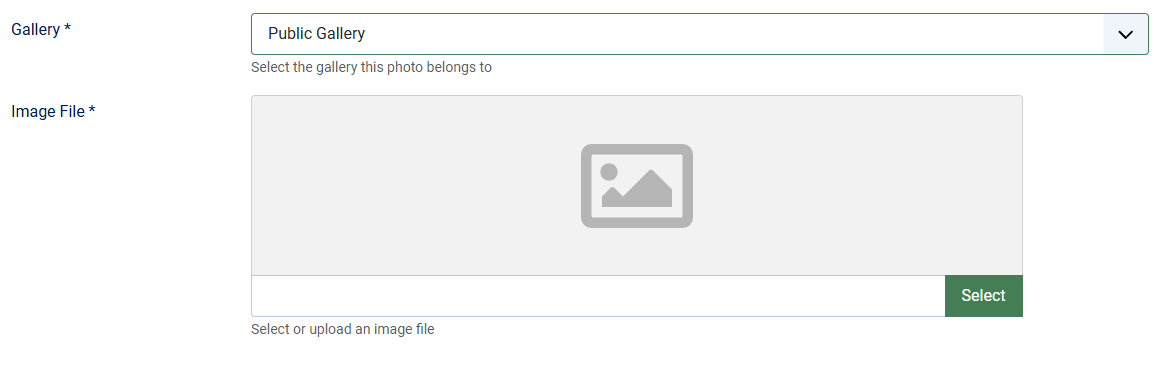
Go to Components » Client Response Gallery » Photos and click the button NEW on top of this page.
Select the gallery this photo belongs to and select an image file from the Joomla images folder.
Note: Resize, Quality and Watermark options will not be applied
4) Import directly from Adobe Lightroom Classic
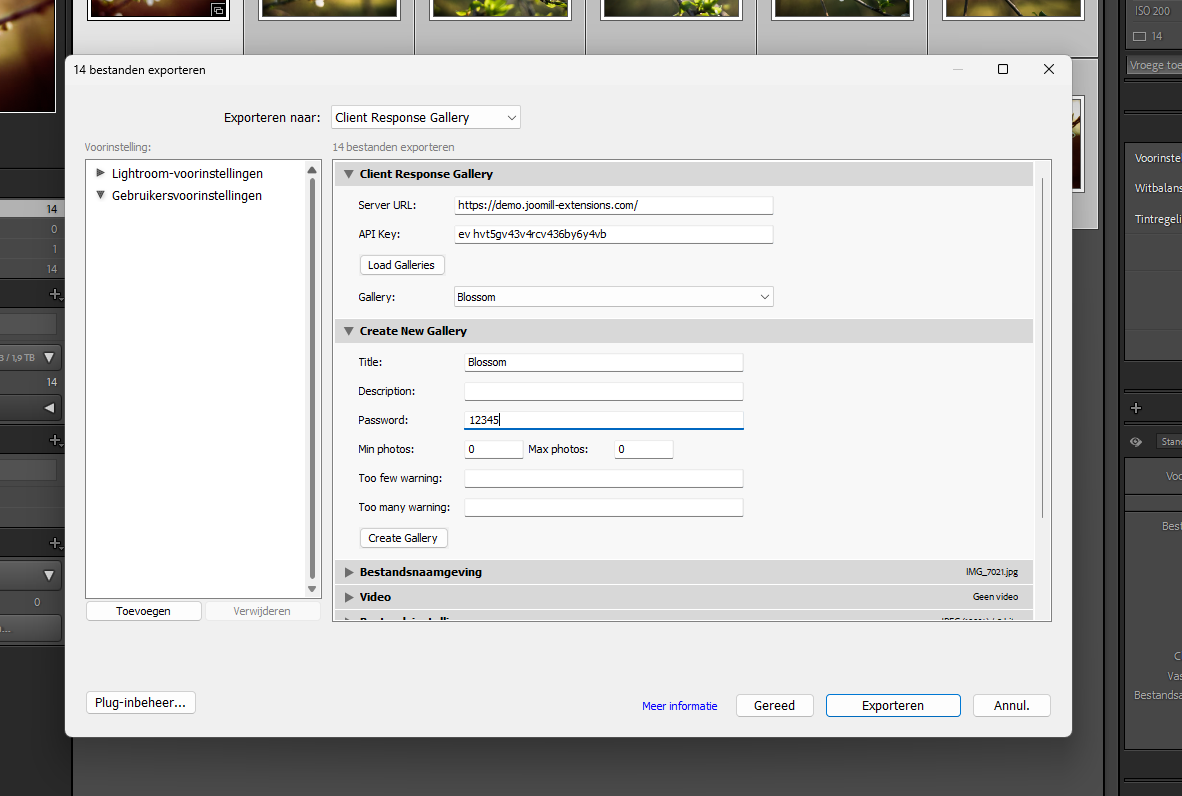
Read more about the Lightroom Classic plugin
Where the photos are stored
Every gallery has its own folder under /images/clientresponsegallery/. Photo files are served straight from that folder, which means the password on a gallery protects the page, not the files: anyone who knows the address of a photo can open it.
Because a folder named after the gallery title is easy to guess, a gallery created in version 1.2.3 or later gets a random suffix in its folder name, for example /images/clientresponsegallery/beach-wedding-9f2c1a7b4e08/. Batch Upload and the Lightroom plugin write into that folder automatically, so you do not have to do anything for it.
Two things to keep in mind:
- Galleries created before 1.2.3 keep the folder they already use. Their existing photo addresses stay valid, and so does the old guessable name. Create a new gallery and move the photos over if you want the random folder for one of them.
- Photos brought in with Import from Folder or the one-by-one New screen stay where you put them, so there the folder name is your choice.