Create your first gallery
After you installed the Client Response Gallery component you will find the list of galleries in Components » Client Response Gallery » Galleries
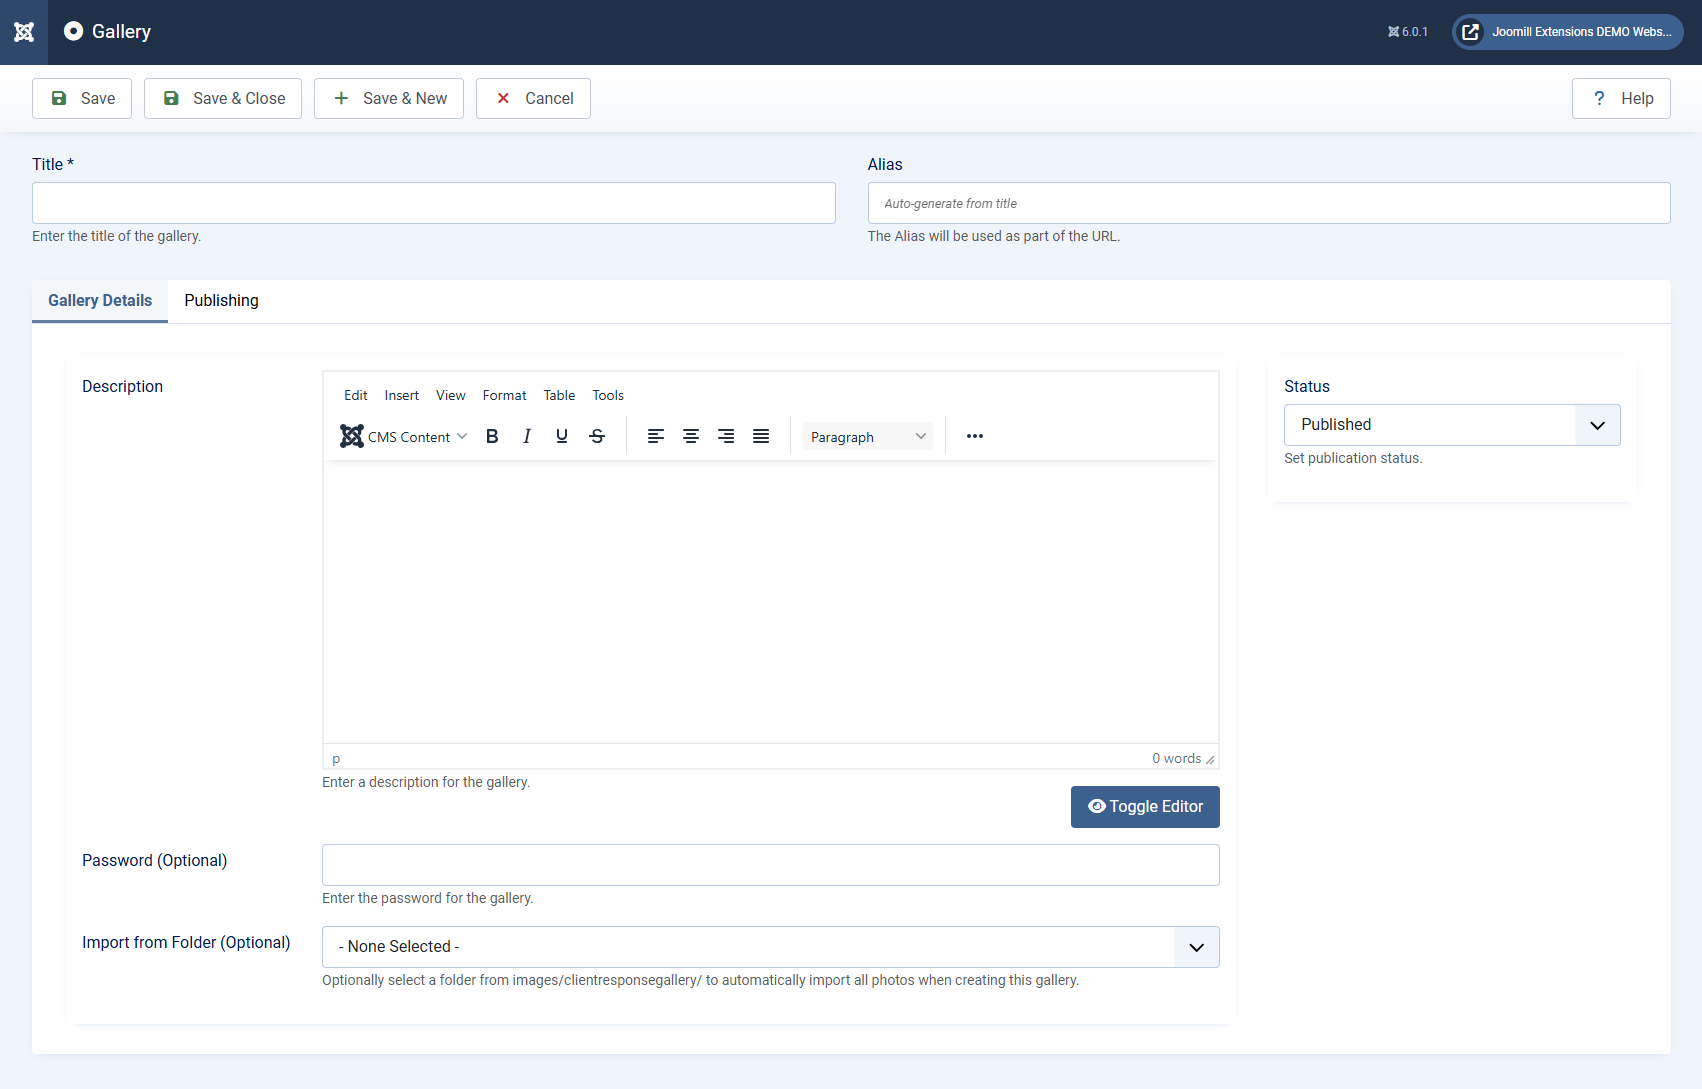
Click the New button to create your gallery
| Title | Enter the title of the gallery. |
| Alias | The Alias will be used as part of the URL. (leave empty to use the title as alias) |
| Description | Enter a description for the gallery. You can show this description in the galleries overview and the gallery detailpage, based on the component options. |
| Status | Set publication status. Choose from Published, Unpublished, Archived, Trashed. Default: Published |
| Password (Optional) | Enter the password for the gallery. Every visitor needs to enter the password before they can show the gallery. The password is stored as a cookie on the device for the period of days as set in the component options. (default: 7 days) When this field is empty, the gallery is open for everyone. |
| Import from Folder (Optional) | Optionally select a subfolder from images/clientresponsegallery/ to automatically import all photos when creating this gallery. You can use this options when the photos are already on the server, but you can also Batch Upload the photos to this gallery on a later moment. For more information read the Batch Upload article. |
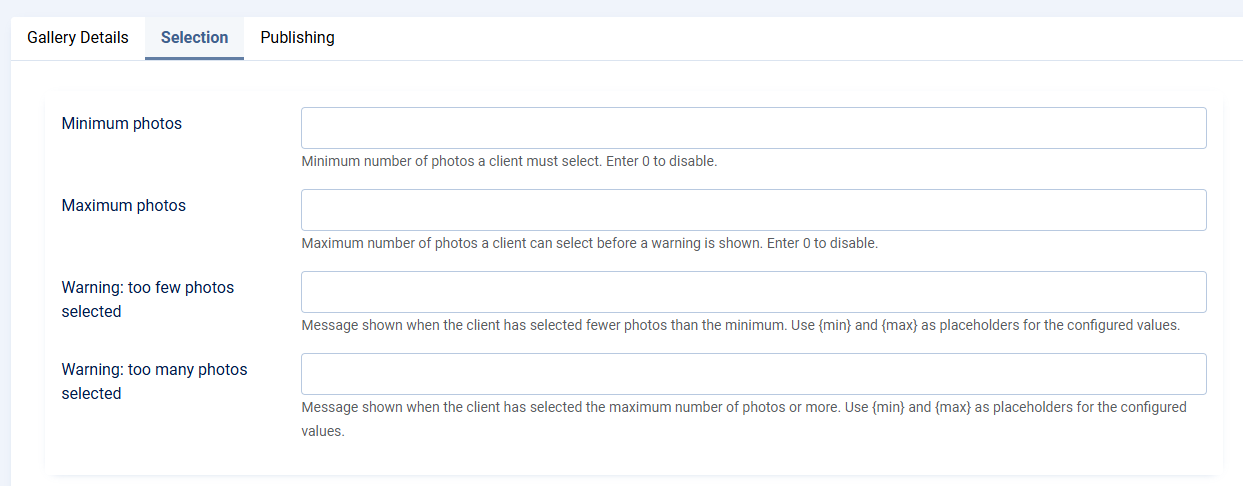
Gallery Selection options
These options override in the general options. Leave empty to use default settings.
| Minimum Photos | Minimum number of photos a client must select. A warning is shown when fewer photos are selected. Enter 0 to disable. Default: 0 |
| Maximum Photos | Maximum number of photos a client can select. A warning is shown when this number is reached or exceeded. Enter 0 to disable. Default: 0 |
| Warning: too few photos selected | Message shown when the client has selected fewer photos than the minimum. Use {min} and {max} as placeholders for the configured values. Example: Please select at least {min} photos. |
| Warning: too many photos selected | Message shown when the client has reached the maximum number of photos. Use {min} and {max} as placeholders for the configured values. Example: You have reached the maximum of {max} photos. Extra photos will incur additional costs. |