How to start
After a successful installation, you'll see the quickstart message.
There are 2 ways to start using the Admin Checklist:
1) Import an example checklist
Several example checklists are available. The default example file has around 10 categories and 80 tasks.
Go to Components > Admin Checklist > Task Management and click the import button at the top of the page. This leads you to administrator/index.php?option=com_checklist&view=import.
Download one of the examples on the right side of the page. A .json file is saved to your computer, and can be used on the import side (left). Select the file and click the green Import File button.
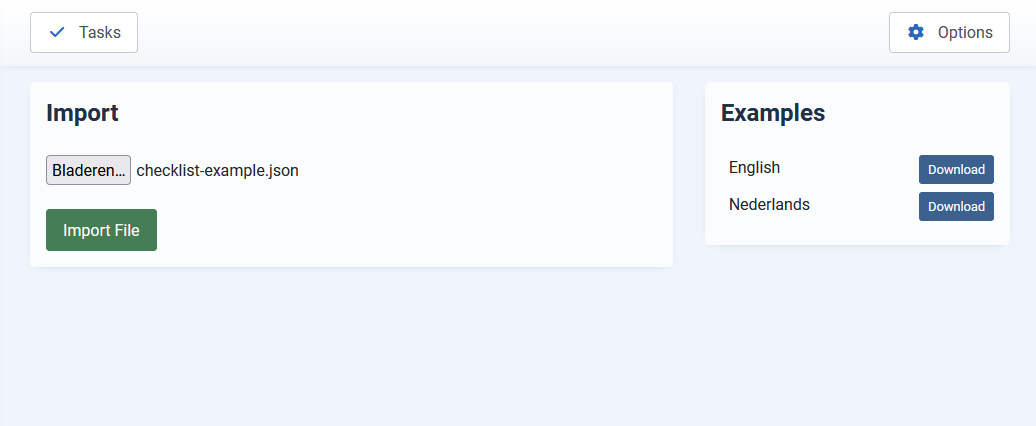
Once the file is imported, you'll see a success message with the number of categories and tasks added to your checklist.
You can add, delete or change any task to build your own checklist from there.
2) Create a checklist manually
Go to Components > Admin Checklist > Categories and add the categories you'd like to use. This works the same way as a Joomla content category: add a title and, optionally, a description. Categories appear in the Admin Checklist Categories module on your dashboard.
Once you've created at least one category, you can add a task.
Choose a title and add a description. On the left side you can select a status (published, unpublished, trashed, archived), select a category, set checked to Yes or No, set the priority (Low, Normal or High, since version 1.6.0), and, depending on which plugins are active, set other options such as an assignee or due date.
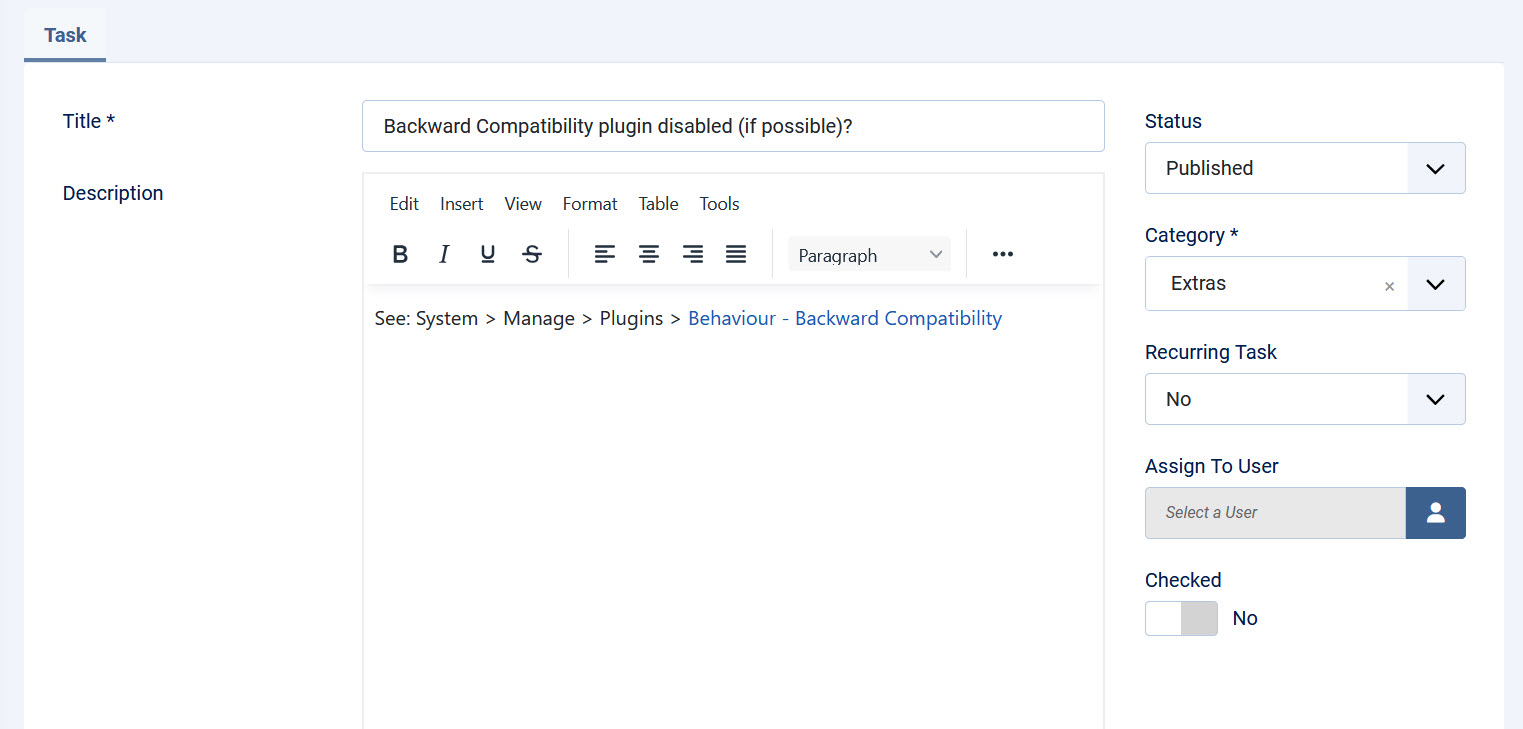
The description field accepts a direct link to any admin page. For example, index.php?option=com_plugins links to the plugins page regardless of the domain you're working on, so the task still works if you export it to another website.
When you're happy with the checklist, go to Components > Admin Checklist > Checklist to see everything you have to do.